/
Managing Spa Day and Spa Break Allocation
Managing Spa Day and Spa Break Allocation
- Madeleine Raynel (Unlicensed)
- Sophie Howse (Unlicensed)
Owned by Madeleine Raynel (Unlicensed)
Block Out Dates on Connect
Below is a simple guide explaining how to block out dates or add allocation in your calendar using Treatwell Connect
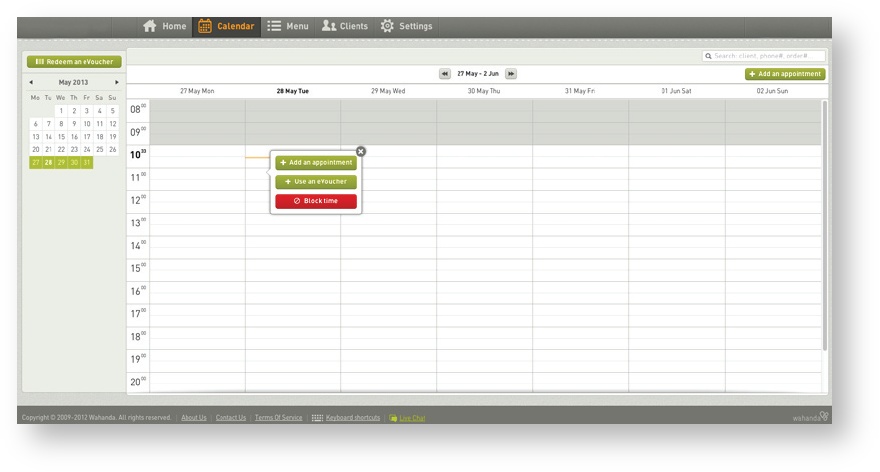
- Begin by logging into Connect and viewing your Calendar
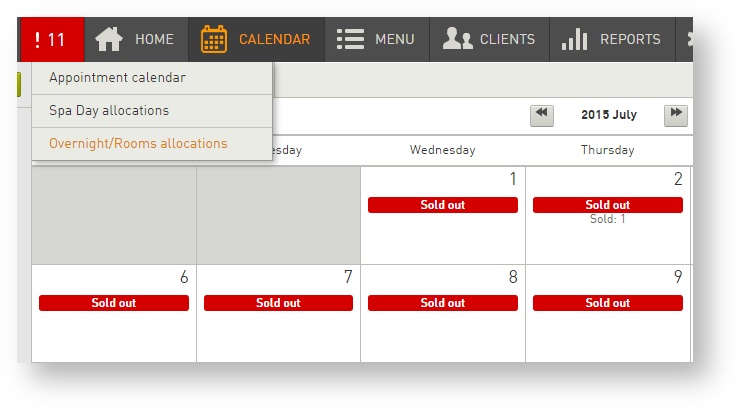
- If your venue has both Spa Day and Overnight Room allocations select which calendar you would like to alter in the top left corner of the page
Closing out a specific date or editing inventory for Spa Days
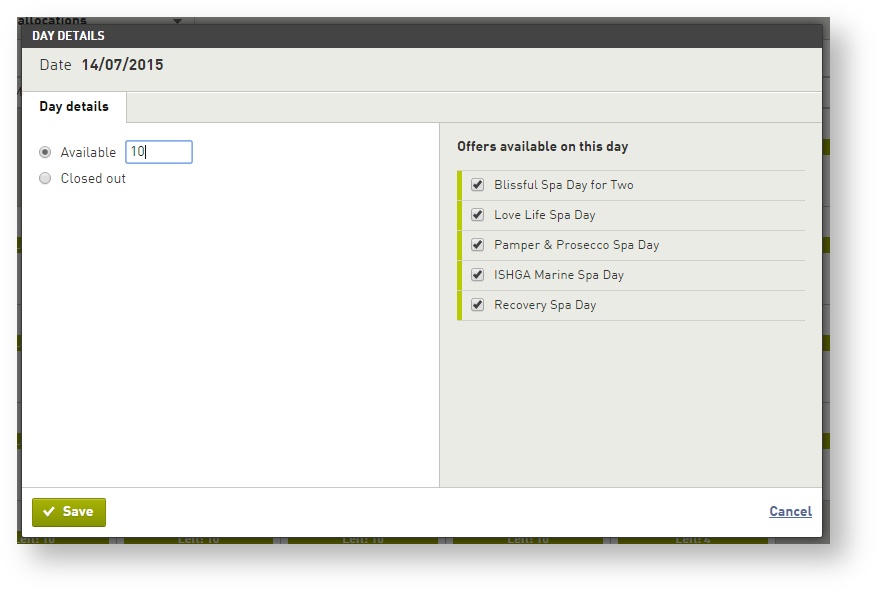
- Click on the date you want to close and the below box will appear giving you the option to alter the number of guests you will accept on that day or close out the date entirely
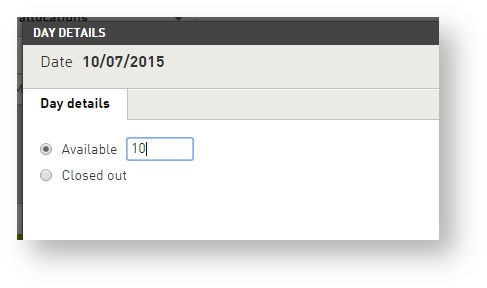
- To change the number of guests you will accept simply change the number in the inventory box and press save
- To close out the date completely, select "Closed Out" then "Save" - it's that simple!
Closing out Overnight Room Allocation or editing inventory
- Make sure that "Overnight/Rooms Allocation" is selected from the drop down at the top of the calendar
- To close out the whole day simply hover over the date, select the tick box, click "Close Out" and "Save".
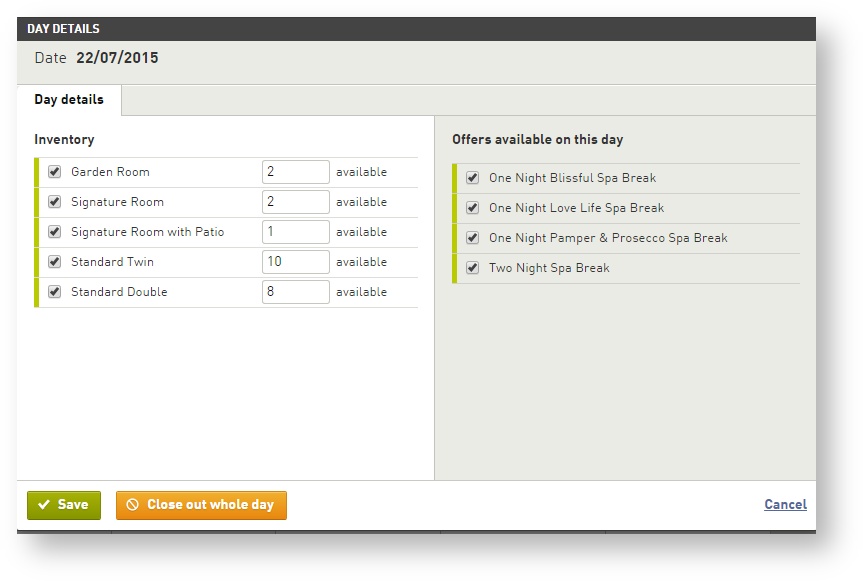
- If you would like to close out individual room types, open up the date, select which type of room you wish to close, un-tick the tick box and press save
- If you wish to amend the amount of rooms for sale, delete the current allocation and add the amount of rooms you wish to sell, don't forget to press save!
Closing out Specific offers
- Make sure you have clicked on the right date you wish to close out the specific offer. Remember to also be in the right calendar!
- The "Day Details" box will pop up. On the right hand side, you will see a list of available offers, select the ones your wish to close out (un-ticking the boxes) then select "Save
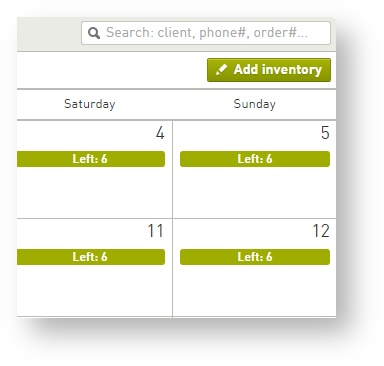
Closing out multiple days
- Rather than clicking on the date you are closing, hover over it until a "tick box" appears
- Click on the box - the date will highlight in a light grey and a button will appear in the top right corner of the the screen giving you the option to "Close Out" - don't press it yet!
- Select the other dates you wish to close and click "Close Out"
- The below box will appear to confirm the dates you have chosen to close. If you are happy, press the "Close our whole day" button


Adding Inventory
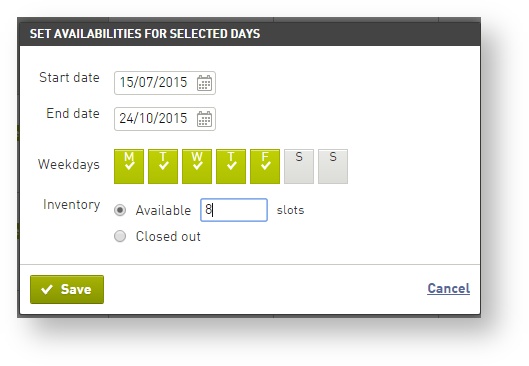
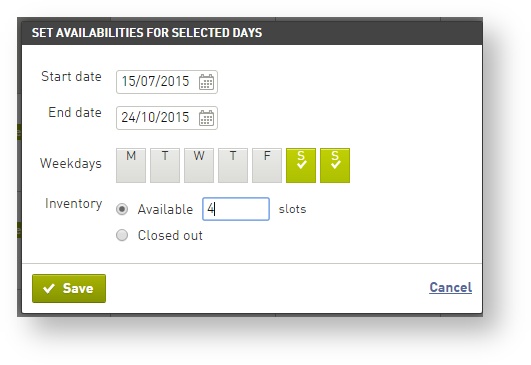
- If you wish to add inventory for multiple dates, please click on "Add Inventory" in the right hand corner of your screen
- Choose the start date and end date you wish to add inventory for
- If you would like different allocations for different days of the week, make sure those days are un-ticked and repeat the process for the days you haven't added allocation
- Don't forget to press save!
- Please be aware, we would recommend that you add allocation for the whole year and then close out dates when busy.
We are here to help so please feel free to contact your account manager should you have any further questions.
, multiple selections available,
Related content
How to load Spa Days and Overnight Stays in Connect
How to load Spa Days and Overnight Stays in Connect
More like this
Managing venue availability in Connect
Managing venue availability in Connect
More like this